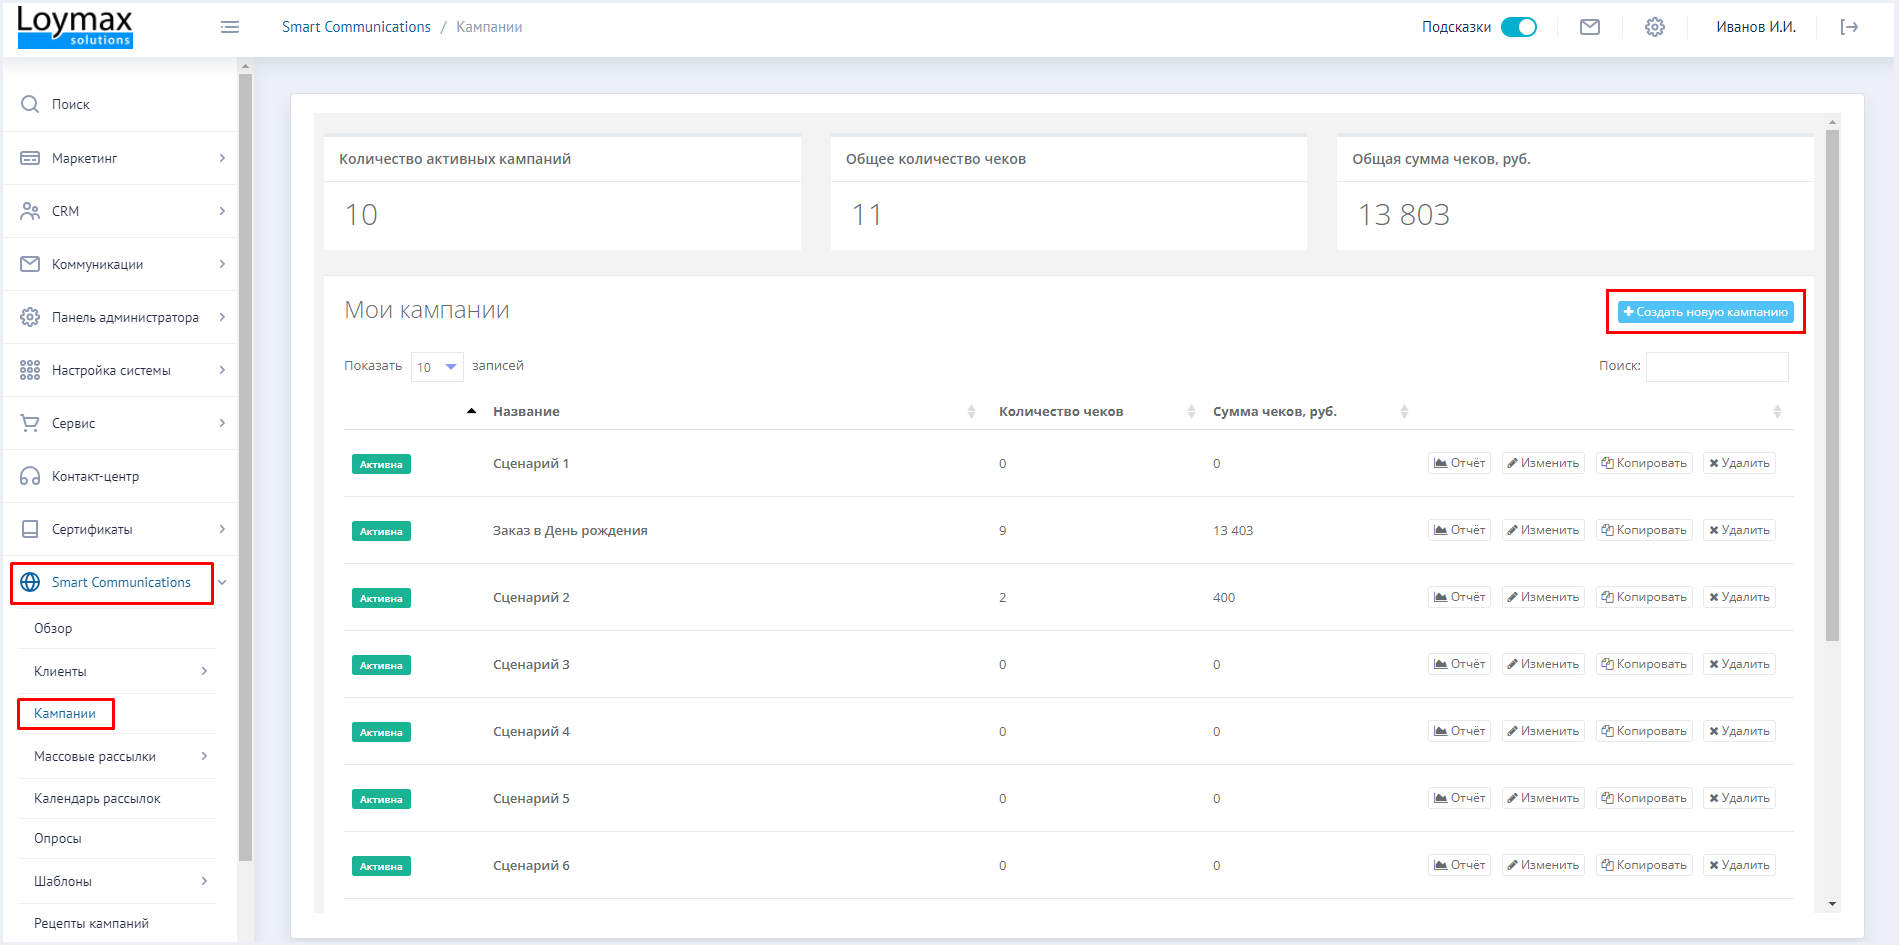
Для создания кампании перейдите в соответствующий раздел в Smart Communications и нажмите кнопку Создать новую кампанию.
Откроется окно с редактором кампаний.
|
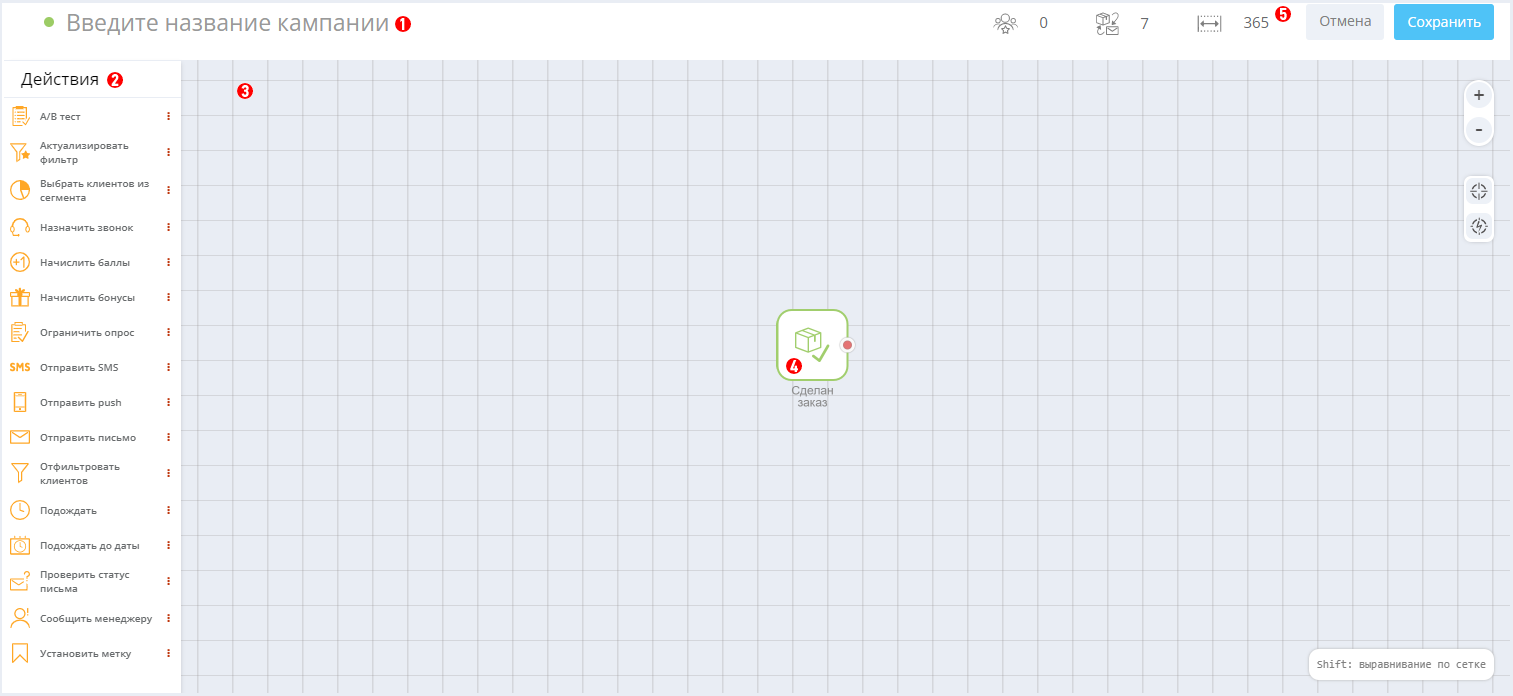
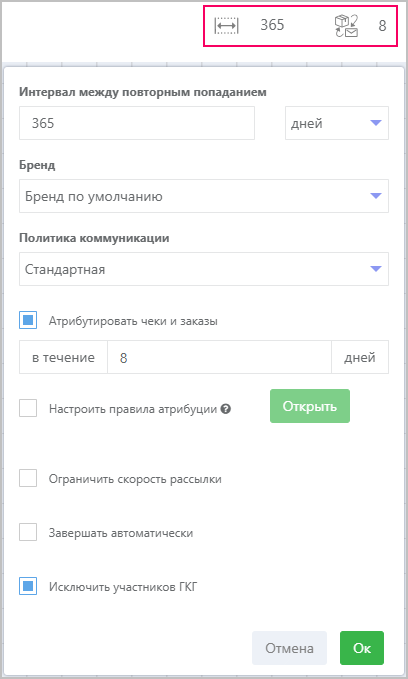
Для новой кампании необходимо указать название в поле  . . В разделе Атрибуция (см. изображение справа) установите необходимые параметры: - Интервал между повторным попаданием определяет, с какой периодичностью клиент будет попадать в цепочку. Например, настройка "365 дней" разрешает повторное попадание клиента в кампанию не ранее, чем через 365 дней с последнего действия, совершенного с данным клиентом в данной кампании. При этом, пока клиент движется по цепочке (например, находится на действии Подождать), он не попадёт в неё повторно (даже при нулевом интервале).
- Бренд. Поле доступно при подключенной функциональности брендов. От выбранного бренда зависит набор доступных политик коммуникации и отправителей, а также то, как будут работать некоторые триггеры.
- Политика коммуникации. Выберите одну из настроенных политик коммуникаций. Она будет применяться к действиям отправки сообщений, если для них не выбрана политика коммуникаций.
- Атрибутировать чеки и заказы. Настройка позволяет задать период, в течение которого чеки и заказы считаются связанными с данной рассылкой. Если флажок снят, то покупки не будут связаны с данной рассылкой. При необходимости можно настроить правила атрибуции, связывающие чеки с данной кампанией, отметив соответствующий чекбокс.
- Ограничить скорость рассылки. Установите чекбокс, если необходимо установить ограничение. Далее воспользуйтесь ползунком, чтобы указать скорость отправки сообщений. Рекомендуемое ограничение составляет 5 000 сообщений в минуту.
- Завершать автоматически. Данный атрибут позволяет задать автоматическое завершение кампании. Отметьте чекбокс и появятся два варианта для выбора:
- При наступлении даты (в выпадающем календаре укажите дату завершения кампании);
- После попадания в кампанию определенного количества клиентов (укажите необходимое количество клиентов для проводимой кампании).
- Исключить участников ГКГ. Если флажок установлен, клиенты, включённые в глобальную контрольную группу, не будут участвовать в данной кампании, даже если удовляетворяют условиям триггера.
|
|
В колонке Действия  отображается перечень доступных действий. Для создания цепочки кампании необходимо перенести необходимые действия из меню слева в поле отображается перечень доступных действий. Для создания цепочки кампании необходимо перенести необходимые действия из меню слева в поле  . Действия должны начинаться с триггера, а далее между ними должны быть установлены связи путем проведения линий между точками. . Действия должны начинаться с триггера, а далее между ними должны быть установлены связи путем проведения линий между точками. В центре активного поля находится Триггер  . Например, триггерами для начисления бонусов могут быть: . Например, триггерами для начисления бонусов могут быть: - наступление даты;
- событие, связанное с покупательской активностью;
- событие, связанное с активностью клиента в приложении.
Триггер — это событие, активирующее цепочку действий. Каждый вид триггеров имеет свой набор параметров. На выходе из триггера цепочка получает массив клиентских профилей, для которых выполняется заданное в триггере условие. Подробнее о триггерах можно прочитать в статье.
Действие — это то, что Система должна выполнить в отношении клиентского профиля, попавшего в кампанию. Подробнее о действиях можно прочитать в статье. | 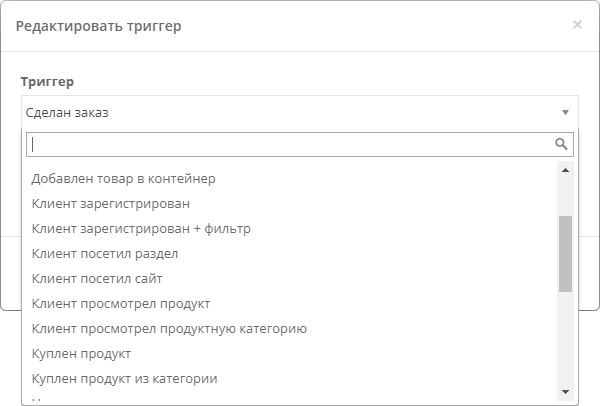 |
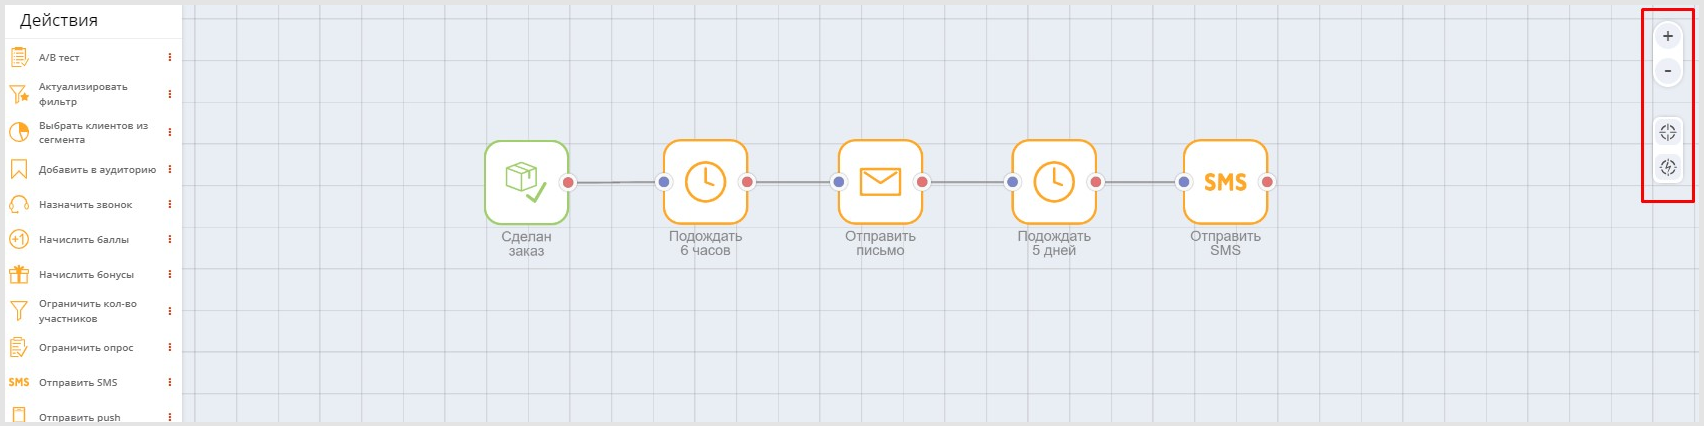
При редактировании кампании можно менять масштаб изображения, а также сдвигать цепочку к центру или к триггеру, воспользовавшись соответствующими кнопками в правом верхнем углу поля редактирования.
Пример кампании: если клиент сделал заказ, то:
- Подождать 6 часов.
- Отправить клиенту письмо.
- Подождать 5 дней.
- Если письмо не было открыто, то отправить клиенту SMS, если известен номер телефона клиента.
После того, как компания создана, необходимо нажать кнопку Сохранить. Созданные кампании всегда доступны для редактирования и по ним можно посмотреть аналитику (отчёты).
Активация/деактивация кампании
При создании кампании она становится по умолчанию активна. Для работы с черновым вариантом кампании рекомендуется кампанию деактивировать. Для этого нажмите на цветовой индикатор слева от названия кампании и выберите Не активная, как показано на скриншоте ниже. Цветовой индикатор изменится с зеленого на оранжевый. Активировать кампанию стоит только после проверки на корректность всех действий и условий.
Для новых Партнёров кампании по умолчанию создаются с неактивным статусом, чтобы избежать запуска тестовых/черновых вариантов кампаний.